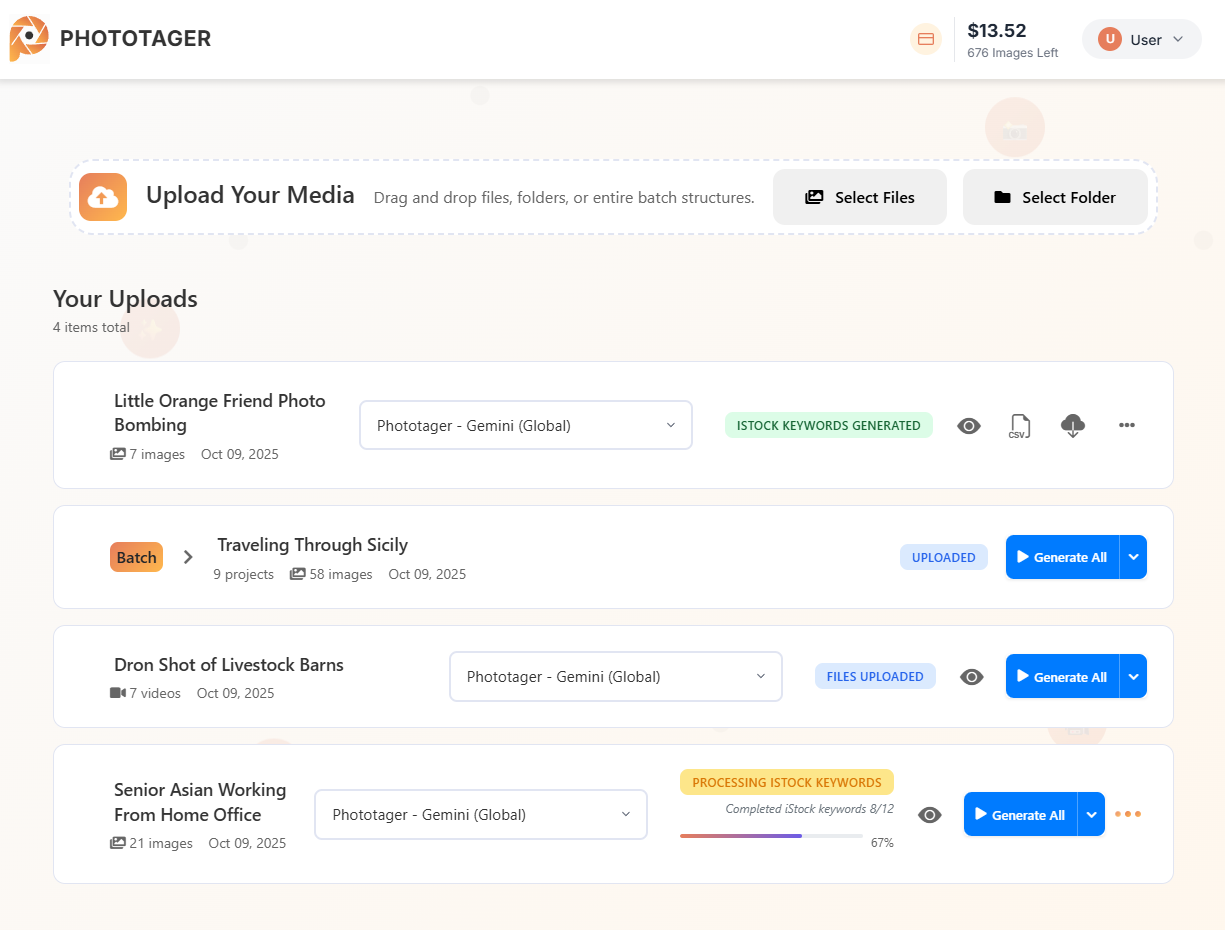
Step-by-Step Workflow

From upload to exportโ€”see how PhotoTager streamlines your entire metadata workflow in 5 simple steps.

Upload folder interface showing drag and drop functionality
1 Upload

Upload Your Media

You can upload single or multiple files, entire folders, or even folders with multiple subfolders. PhotoTager gives you complete flexibility in how you organize your uploads.

  • ๐Ÿ“
    Single or Multiple Files: Upload individual images and videos, or select multiple files at once.
    ๐Ÿ—‚๏ธ
    Entire Folders: Drag and drop complete foldersโ€”your folder structure is automatically preserved.
    ๐Ÿ—‚๏ธ
    Folders with Subfolders: Upload complex folder hierarchies and batch process entire shoots at once.
  • โš™๏ธ
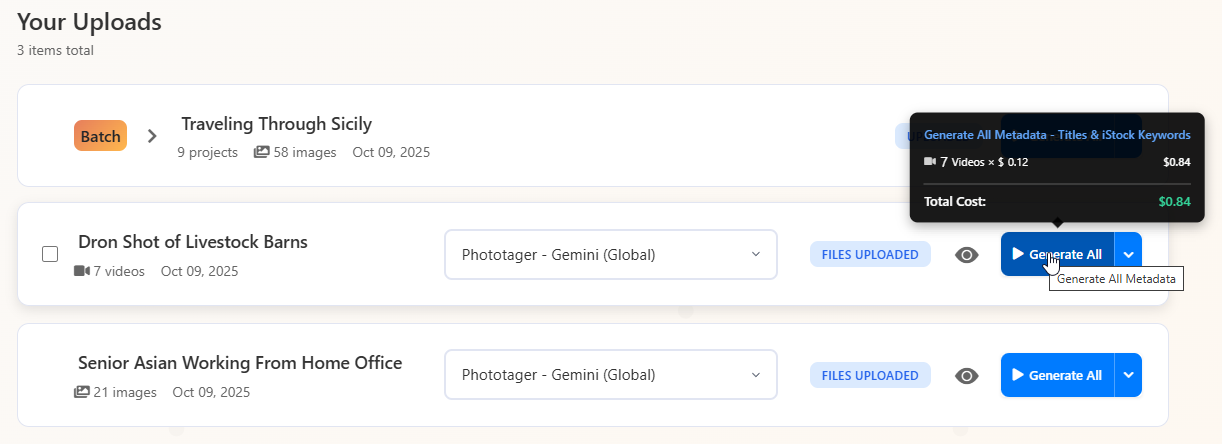
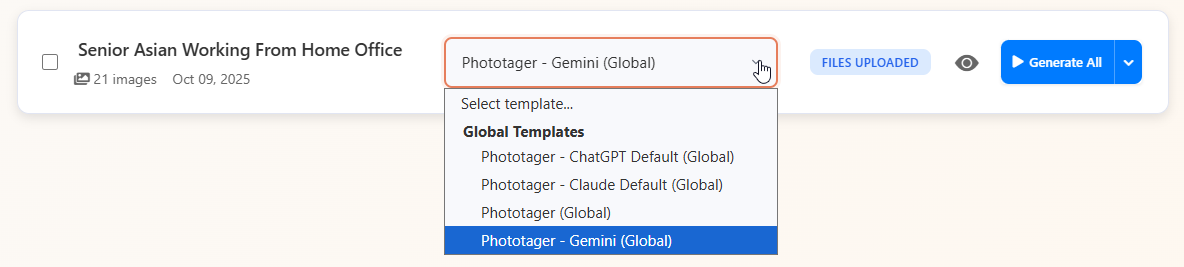
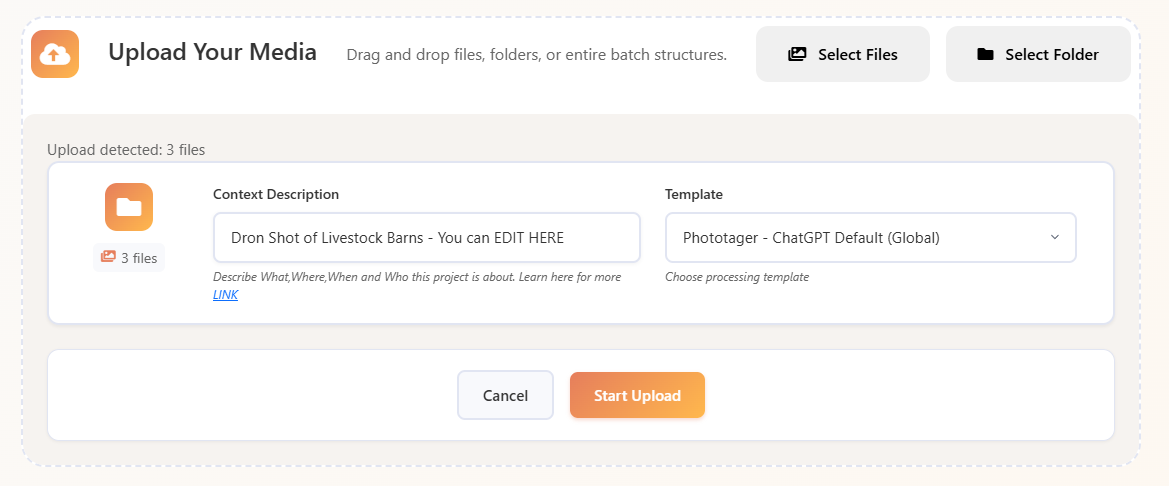
    Choose Your Template: Select from Gemini, Claude, or ChatGPT templates right on the upload screen.

๐Ÿ“ Folder Name as Context:

When you upload a folder, the folder name serves as the context for metadata generation. You can edit this directly during upload.
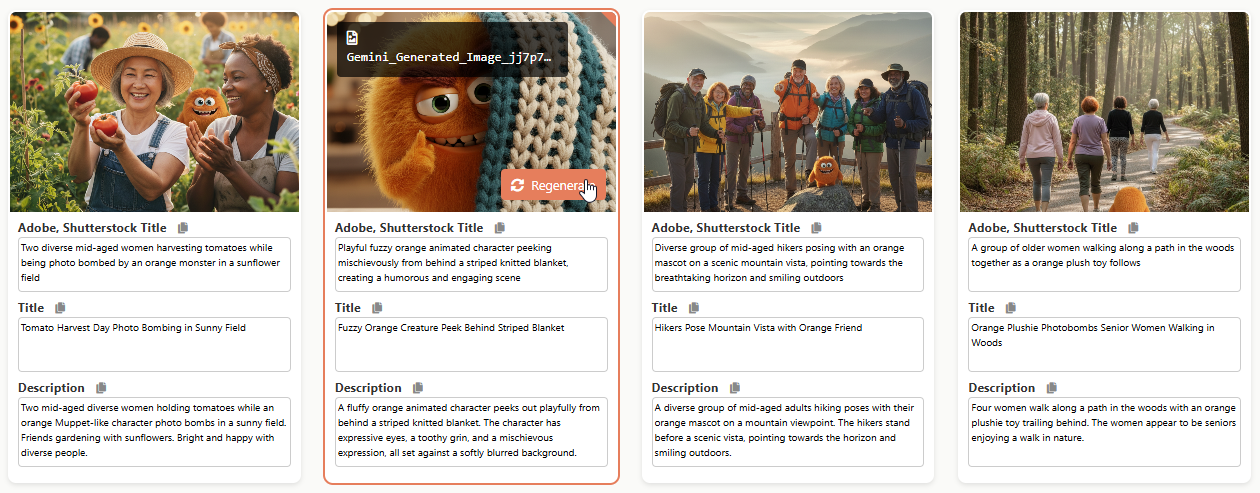
Edit context

๐Ÿ“Œ The Importance of Context

Context is the secret to getting perfect metadata. It gives the AI model additional information it can't see in the image alone.

Example from the screenshot above:

"Dron Shot of Livestock Barns"

This simple context tells the AI that these are livestock barns filmed with a drone. Without this context, the AI might describe it generically as "aerial view of farm buildings"โ€”but with context, it creates accurate, searchable metadata like "drone footage", "livestock facilities", "agricultural infrastructure", etc.

Better context = More accurate keywords = Better discoverability = More sales! ๐ŸŽฏ

๐Ÿ’ก

Pro Tip: We recommend using Gemini for Videos and ChatGPT or Gemini for Images, but feel free to try them all to find what works best for your content.

Generate metadata interface showing batch processing
2 Generate

Generate All Metadata

Once everything is uploaded, you can edit your context or change your template. When you're ready, click "Generate All Metadata" to create professional metadata for your entire project.

โœ๏ธ Edit Context & Template

Before generating, you can refine and edit your context description.

Edit context

You can also change the template.

Edit template interface
  • โœ๏ธ
    Titles & Descriptions for All Platforms: Creates SEO-optimized titles and descriptions appropriate for iStock, Adobe Stock, Shutterstock, and all major platforms.
    ๐Ÿ”‘
    Universal Keywords: Generates keywords appropriate for almost every platform Adobe Stock, Shutterstock, Pexels โ€”except iStock, which has special vocabulary requirements.
  • ๐Ÿ“ธ
    iStock Keywords Separate: You need to first generate Titles and Adobe Keywords, then generate iStock Keywords separately. They are charged separately.
  • Processing Status:

    When you Click Generate All, Phototager will process in 2 steps. In the 1.Step - Titles, Descriptions and Universal Keywords

    Edit context

    When the 1. Step is done The 2. Starts

    Edit template interface

    When everything is generated you will see ISTOCK KEYWORDS GENERATED

    Edit template interface
๐Ÿ’ก

Important: Generate Titles & Adobe Keywords first, then generate iStock Keywords as a separate step. All credit costs are display before you generate. In the image above you can see the price for both steps.

Edit interface showing keyword editing and bulk operations
3 Edit & Refine

Edit & Refine Your Metadata

After generation, fine-tune your metadata with powerful editing tools. Make bulk changes across your entire project or adjust individual items with precision.

  • โœ๏ธ
    Inline Editing and Adding Keywords: Simply click to edit titles, descriptions. You can add keywords, or copy-paste a list of keywords from other stock platforms. For iStock, you can search the keywords that are in their special vocabulary
  • ๐Ÿ”„
    Bulk Operations: Add, remove, keywords across hundreds of files simultaneously. You can do this by Clicking a Select All button. When all images are selected you can add keywords to all of them. Or remove certain keywords you do not like, these keywords will be removed from all images.
  • โœ๏ธ Adding, Removing Keywords and Suggested Keywords:

    You can simply remove keywords by clicking the red cross and add a suggested keyword with + sign

    Edit context
  • Copy to Clipboard: You can copy to clipboard all generated metadata, Titles, Description and Keywords. When you copy the Keywords you copy all the list that is comma separated. This way you can copy-paste to any Editor like DeepMeta, qHero or another Stock Platform
  • ๐ŸŽฏ
    Reordering files and Keywords Reordering: Keywords can be ordered by names and scores. These scores are also represented with colours so you can spot them easily. Higher score means greatest confidence of keywords and Low score means low confidence.
    You can display images and reorder them by their file names.
  • โœ๏ธ Re-Generate Metadata you do not like

    Sometimes it can happen that there are no results or maybe you do not like them. You can click Regenerate button, this will generate all new metadata, with no charges.

    Edit context
๐Ÿ’ก

Pro Tip: Use bulk editing to add platform-specific keywords (like location tags or seasonal terms) across entire batches in seconds.

4 Export

Export

Export your metadata in the format you need for any stock platform.

โœ๏ธ Download CSV files for bulk uploads to stock sites.

We have many templates for many different stock platforms, and editors, ESP, qHero, DeepMeta, Shutterstock, Adobe Stock and many more.

Edit context

Or embed IPTC metadata directly into your images. For this, it is recommended you upload the original file.

Edit context
๐Ÿ’ก

Pro Tip: ou can use IPTC integrated medatada in Images on all platforms.

Ready to streamline your workflow?

Join thousands of photographers saving 75% of their time on metadata management.

Start Your $2 Trial Today โ†’